A Microsoft PowerPoint presentation might have many elements such as narration, animation, pointer movements, timings, and more. When burning PowerPoint to DVD, the elements in the PowerPoint itself can be saved if you get the settings right.
Some people might also ask Can I burn a PowerPoint to a DVD that will play on a normal DVD player?
You can burn PowerPoint to DVD disc in two different ways. One is turning the PPT into a slideshow video, and then burn the video to a Video DVD disc. Video DVD disc is playable on a normal DVD player and any of the computers with a DVD player software. Another is to burn a Data DVD disc. Data DVD disc is convenient to be shared with others for using the file inside. If you burn music or pictures to a Data DVD disc, most of the DVD players can also read the MP3 and JPEG files in the disc.
In the following, Part 1 is about how to burn PowerPoint to a Video DVD disc with DVD authoring software, and Part 2 is about how to burn PowerPoint to a data disc in the Windows system tool.
[Best DVD Creator Software] Burn PowerPoint to DVD for Playing on Normal DVD Player
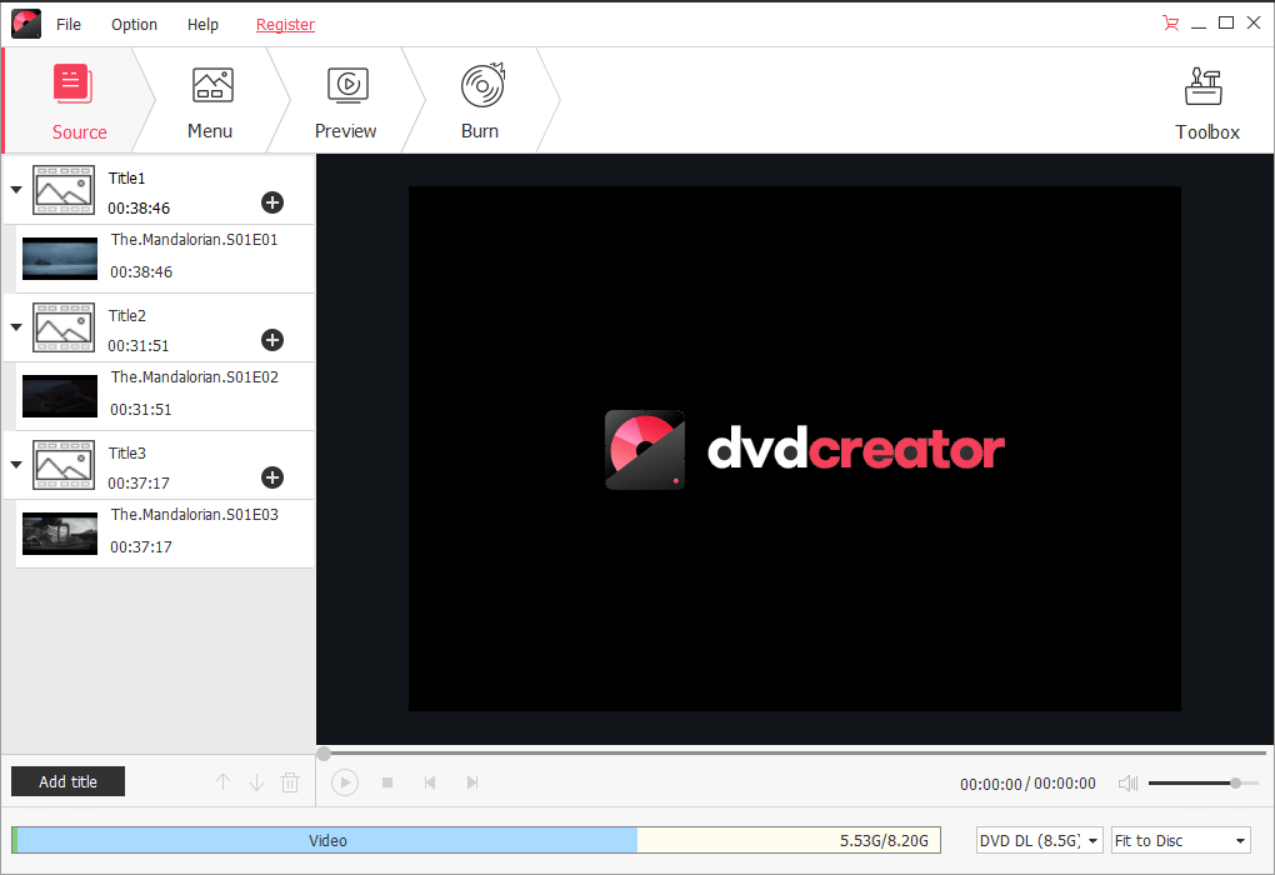
DVD Creator works on Windows 10/8.1/8/7/Vista/XP and Mac OS. You can import PowerPoint slideshow videos to the program and burn them to a Video DVD disc. You can even export PowerPoint as multiple images and then use these images to burn a DVD slideshow disc – with the help of DVD Creator. The Video DVD disc can have a stunning DVD menu and customized background music.
Free Download Free Download
The key to burn PowerPoint to a Video DVD disc and save all the elements in the original PPT at the same time is to turn it into a video (MP4 or WMV), and then use DVD Creator to burn PowerPoint videos to DVD.
Step 1. Turn PowerPoint Presentation into a Video
Make sure all your recent work has been saved in PowerPoint presentation format (.pptx). Then, click File > Export > Create a Video. In the first drop-down box, select the video quality you want. The second drop-down box tells whether your presentation includes narration and timings. The default time spent on each slide is 5 seconds. You can change that. At last, click on “Create Video”. Your PowerPoint presentation will be turned into a .mp4 or .wmv video.

Step 2. Insert a DVD Disc to the Computer
Insert a DVD-R, DVD+R, DVD-RW, or DVD+RW disc to your computer drive.
Step 3. Import PowerPoint Video to DVD Creator
Launch DVD Creator > click “Create a DVD Video Disc” > add PowerPoint videos to the program.

Step 4. Customize the DVD Menu
Go to the “Menu” tab. Here you can click the drop-down list of “All”, select a DVD menu theme you like or select “No Menu”. Almost all the elements on the DVD menu can be customized by yourself.

Step 5. Burn PowerPoint to Video DVD Disc
Click on “Burn” and start to burn PowerPoint to DVD at a fast speed. You will soon get your Video DVD disc, which can be played on Blu-ray/DVD player.

Burn PowerPoint to Data DVD Disc as Mastered Burning Format on Windows
Step 1. Insert a blank DVD disc to your PC.
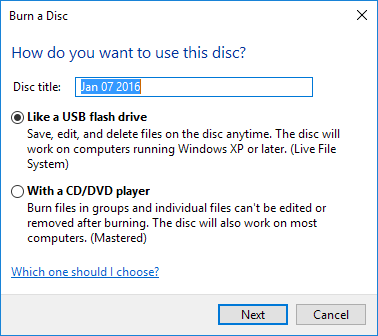
Step 2. Double-click the drive icon to activate the Burn a Disc window. You can select “Like a USB flash drive” or “With a CD/DVD player”. If you choose Like a USB flash drive, you can edit/add/delete the files on the disc many times. But the disc might not be read on other computers. If you choose With a CD/DVD player, the files are really burned to the DVD disc, you can freely share the disc to others. Other people can read the content on your disc, copy the files out of the disc but they can’t modify your disc. It is suggested to select “With a CD/DVD player”.

Step 3. Drag and drop your PowerPoint file onto the DVD drive icon.
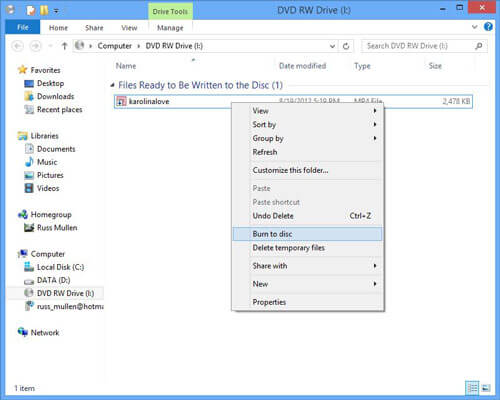
Step 4. Right-click the empty area and then click on “Burn to disc”.

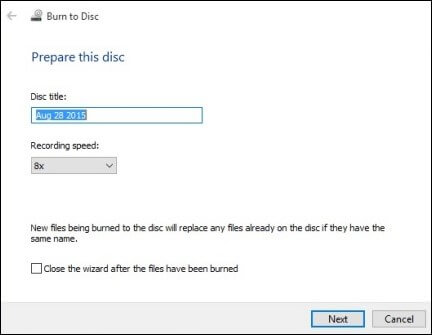
Step 5. Click on “Next” in the Prepare this disc window.

When the burning process is complete, you have burned your PowerPoint to a Data DVD disc.


