If you do a search on Google about how to burn CD on Mac, you will find the Apple official macOS User Guide ranks 1st, which shows us the most simple and cost-free way of burning a CD on Mac using Finder. You must be familiar with Finder. Just need to insert a CD to your Mac, open it with Finder, drag the files to the pop-up window, and click on Burn. Then the CD you have burned will be able to play on Mac, Windows, and other computer systems. But what you must know is that with Finder you can only burn Data CD.
What is that? The main purpose of burning Data CD is to backup files. “Files” are not limited to certain types, but arbitrary computer files such as videos, photos, ISO images, PowerPoint documents, project files, installation packages, etc. Your blank CD can be a medium for storing 650 to 700 MiB of data, and of course, it can store audio files in different formats. If you burn MP3 music files to a Data CD, the CD player might be or might not be able to read them and play them. It depends. To burn any kind of audio to CD that you can sure it will play on a standard CD player, Audio CD is what you need to burn, then you need other tools like BlurayVid DVD Creator.
In order to clear all the obstacles in the process of burning CD, the first part we will talk about how to burn CD with Finder, the second will talk about how to burn Audio CD on Mac.
The Steps of Burning CD with Finder
Blank CD is rather inexpensive now. 100-Pack CD-R only cost you around $16. Prepare a CD, and ready to copy & burn data into it.
Step 1. Insert a CD to your Mac’s CD/DVD/Blu-ray writer, and this window will appear. The system knows that you have inserted a blank CD, and it shows the most recommended method to deal with it – that’s to open it with Finder. It’s better to make this action the default so you don’t have to click OK once and once again when another CD is inserted.

Step 2. Double click the Untitled CD on the left side. The blank panel on the right side is to show the files you have dragged in and are about to burn. Drag an entire folder for burning CD is also allowed.
You might be a bit worried here, what if I want to delete or move the files in this pane? Don’t have to worry about this because the file will appear as aliases. The original file won’t be modified no matter what you have done in this pane. You can rename the files and arrange them freely.
When you think the files are all well organized, it’s time to press the Burn button.

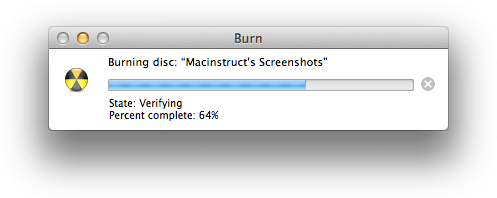
Step 3. This window appears to let you personalize the disc name and select the burn speed. If they do not need to be changed, you can start the burning process.

A CD full of contents and data is beckoning to you.

How to Burn Audio CD for Playing on CD Players
We here introduce you to BlurayVid DVD Creator as the best quality Audio CD burning software. You can burn about 80 minutes of songs to a 700MB CD-R, then play the CD on many home CD players and car CD players. Here are the download buttons of BlurayVid DVD Creator. Install it on your Mac first.
Free Download Buy It Now
There is zero learning curve, you just start right away burning CD.
Step 1. Choose “CD Burner” on the initial interface.
Step 2. Insert a CD, add music, and click on “Burn”. It’s just that simple.
You might wonder what else BlurayVid DVD Creator could do on Mac. Here are the functions:
- Burn DVD: the core function of this tool. It can create Video DVD with real and fascinating DVD menu for enjoying on TV screen.
- Video Editor: simple video editor to help you crop, trim, rotate, change aspect ratio, etc.
- Photo Slideshow: import images, and the program will generate photo slideshow with background music and plentiful transition effects. It is a one-click operation and fully automatic.
- ISO to DVD: copy DVD movie ISO file to a blank DVD disc.
To all you lovely readers, welcome to download & try it on your Mac.
Free Download Buy It Now
