
Lots of Blu-ray players support video file playback on a USB stick or HDD, but that’s not what we are going to talk about in this post. We are going to talk about how to play video from a USB drive on Blu-ray player as if playing from a physical disc. To achieve this, we need to burn video to AVCHD folder.
Imagine your Blu-ray player can directly read AVCHD folder from a USB drive or an external hard drive and have a full AVCHD playback as if you are playing from a real Blu-ray disc, with full support of soundtracks, subtitle tracks, Blu-ray menu .etc. When you have finished watching the movie, you can burn a new one to AVCHD folder, and then put the folder into the drive once again. This is really convenient compared to burning video to physical disc.
AVCHD (Advanced Video Coding High Definition) format is commonly used and generated by the camcorder. But beyond that, we can burn movies to an AVCHD disc, or to an AVCHD folder and put into an SD card, USB sticks, internal and external hard drive.
AVCHD Folder Structure
Project name
AVCHD
BDMV
BACKUP
CLIPINF
PLAYLIST
STREAM
INDEX.BDM
MOVIEOBJ.BDM
Many models of OPPO and Samsung Blu-ray players, or game consoles such as PS3 can detect and play the full AVCHD folder/INDEX.BDM file. In the following, you can download a Video to AVCHD Folder Creator and quickly burn a sample to test on your Blu-ray player.
How to Burn Videos to AVCHD USB Key on Windows
Step 1. Download and Install the Program
ConvertXtoHD is the best tool for burning movies to AVCHD folder. Very little software can do it successfully. This program allows you to edit or add the subtitle tracks, soundtracks, chapters, and create a stunning Blu-ray menu for your imported videos. You can limit the target output size to fit your storage device capacity and meet the requirements of the Blu-ray player.
Free Download
Step 2. Import and Edit the Videos
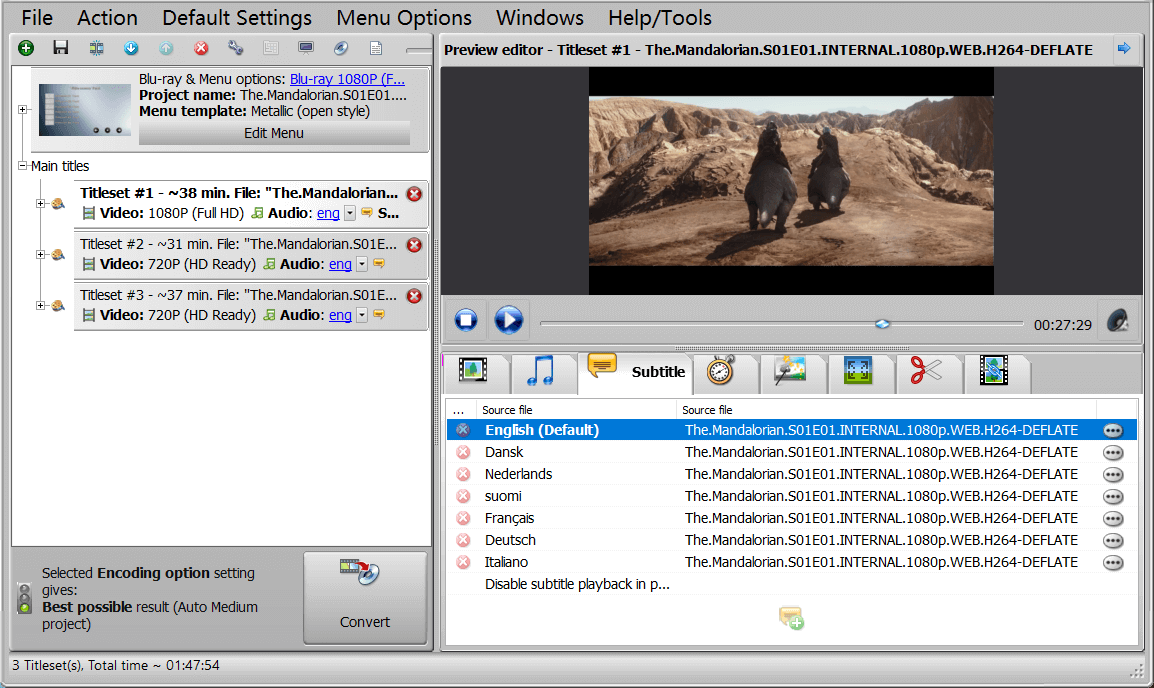
The purpose of burning the AVCHD folder is to integrate various videos into the file that playback like a Blu-ray disc. You can load the main movie with bonus videos, movie trailers, soundtracks or add a series of videos to the program for burning.
After the videos are imported, select a video and the edit panel will show up. This is for editing audios, subtitles, chapters, clipping video, merging .etc.
Step 3. Create a Menu for Your Videos
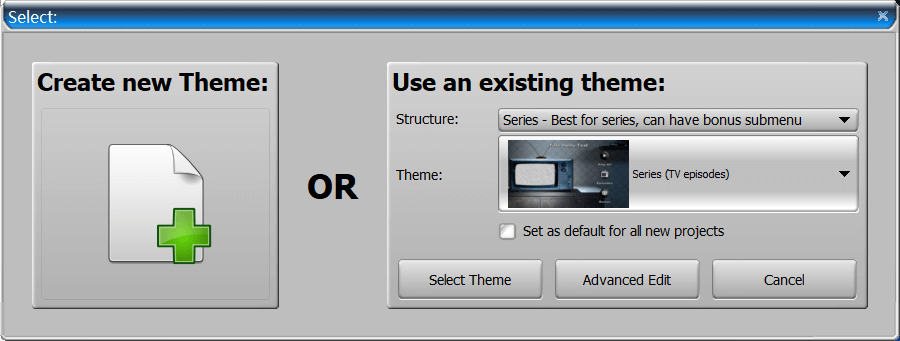
Click on “Edit Menu” and this window will pop up. You can create a new theme. It’s like completely DIY the menu. Or maybe you can find the right template from the existing themes.
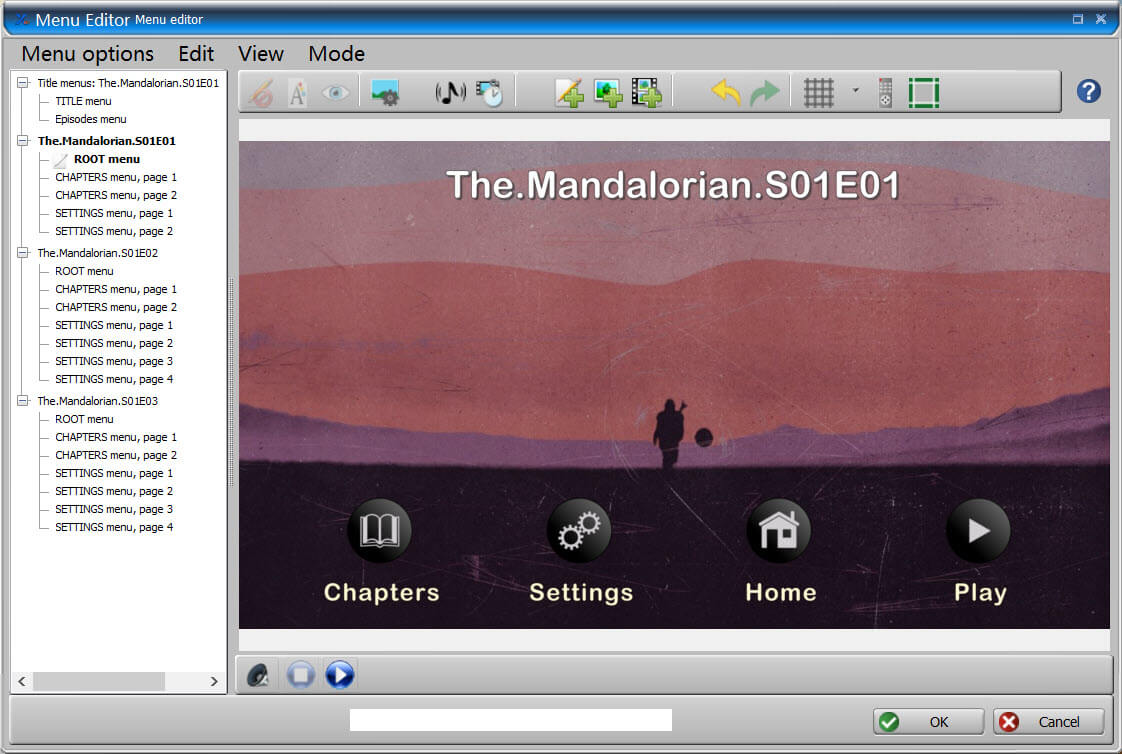
And this is how the menu might look like in the Blu-ray player: you can select a chapter for playing, or switch to another subtitle tracks/audio tracks in Settings.
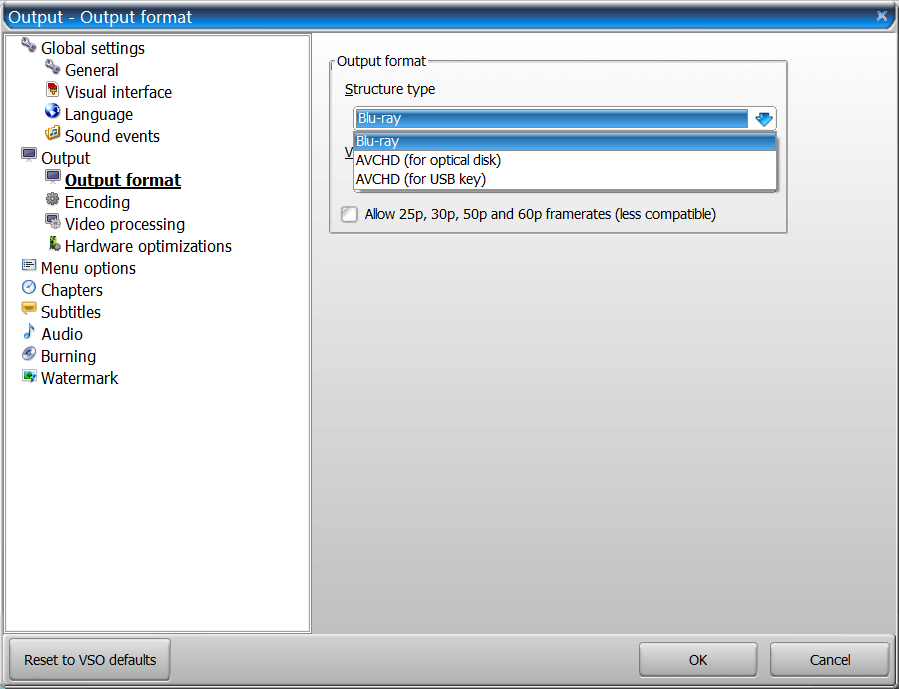
Step 4. Select AVCHD (for USB Key) as the Output Format and Complete the Setup
- Click on “Default Settings” > “Output format” on the menu bar.
- Select AVCHD (for USB Key) as the output format. This powerful tool can also burn videos to AVCHD for optical disk or Blu-ray.
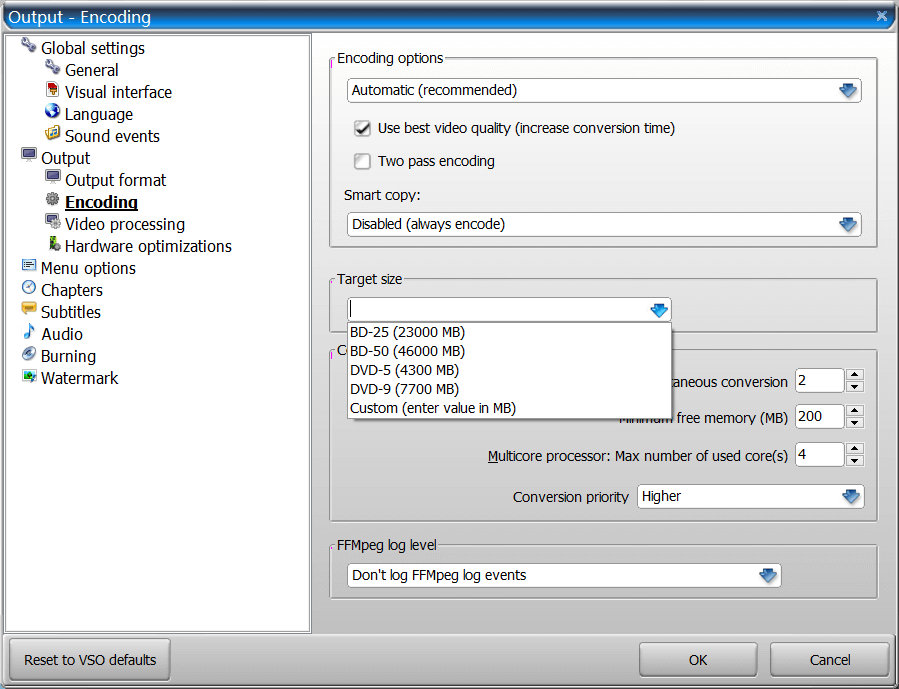
- Go to the Encoding tab and custom the target size if needed.
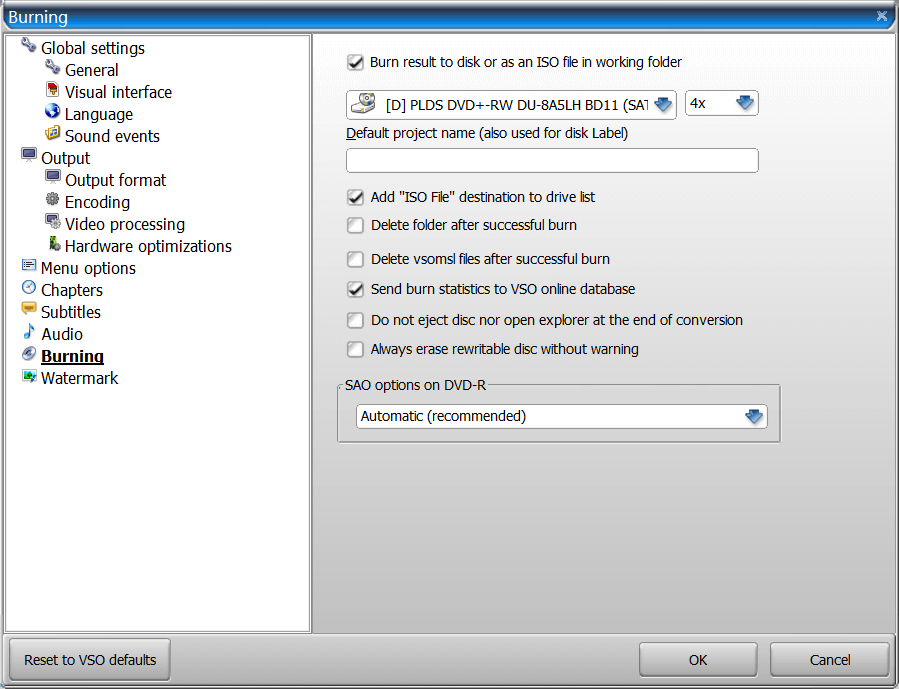
- Go to the Burning tab and check Add “ISO File” destination to the drive list.
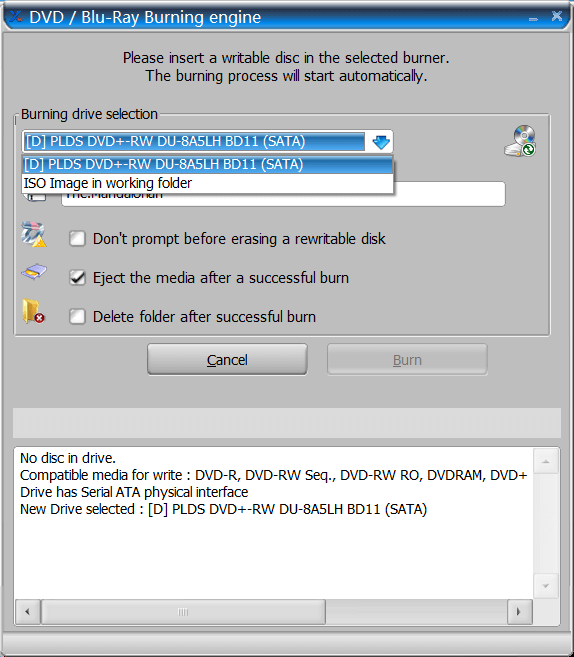
Step 5. Click on “Convert” to Start Burning
Click the Convert button on the main interface. Wait a while until this window pops up. You will need to select “ISO Image in working folder”, and the burning process will start automatically.
After done, put the AVCHD folder into a USB drive or an external hard disc drive, and then plug the drive into the USB port of your Blu-ray player. Now you can enjoy movies on TV with Blu-ray menu, subtitles, audios, chapters, .etc.
Click the below button to safe download ConvertXtoHD.