Anyone who has tried to burn videos to a Video DVD might already know or discover the fact that DVD is SD, not even HD. The limit resolution of a standard DVD disc is 480P. We can import HD videos into a normal DVD authoring tool, but the output video resolution is still 480P. Does this mean we cannot put 720P or 1080P video on a DVD disc and keep the video resolution? Yes, we can!
We just need a special Blu-ray authoring software that can burn HD videos to AVCHD DVD disc. AVCHD is not a new-type physical media. This is a regular DVD disc and when you burn HD videos to the disc, you select to burn as AVCHD mode. The Blu-ray creator will create a Blu-ray file structure on your regular DVD disc. This allows AVCHD DVDs to store HD or FHD video, but at the same time, because of its Blu-ray structure, AVCHD DVD can only be played on Blu-ray players.
In case you feel a little confused about the resolution, SD (Standard Definition) refers to 480P (720 * 480); HD (High Definition) refers to 720P (1280 * 720); FHD (Full High Definition) refers to 1080P (1920 * 1080).
How to Burn 720P/1080P Video to AVCHD DVD
Most Blu-ray creator software is just able to burn normal video to Blu-ray disc, but this incredible software – ConvertXtoHD is not only able to burn video to Blu-ray disc but also be able to burn video like 1080P MP4, MKV, etc. to AVCHD DVD disc. You can import some HD videos to this program, use it to DIY a beautiful DVD menu, and then insert a regular DVD disc for burning. After done, the AVCHD DVD disc that carries high-quality video can be played on any home Blu-ray player.
Free Download
Step 1. Insert a DVD Disc to Your Computer
Insert a recordable DVD disc into your computer disc drive. You can buy DVD-5 or DVD-9 to your own needs. DVD-5 stores 4300MB data and DVD-9 stores approximately 7700MB.
Step 2. Load HD Videos to the AVCHD DVD Creator
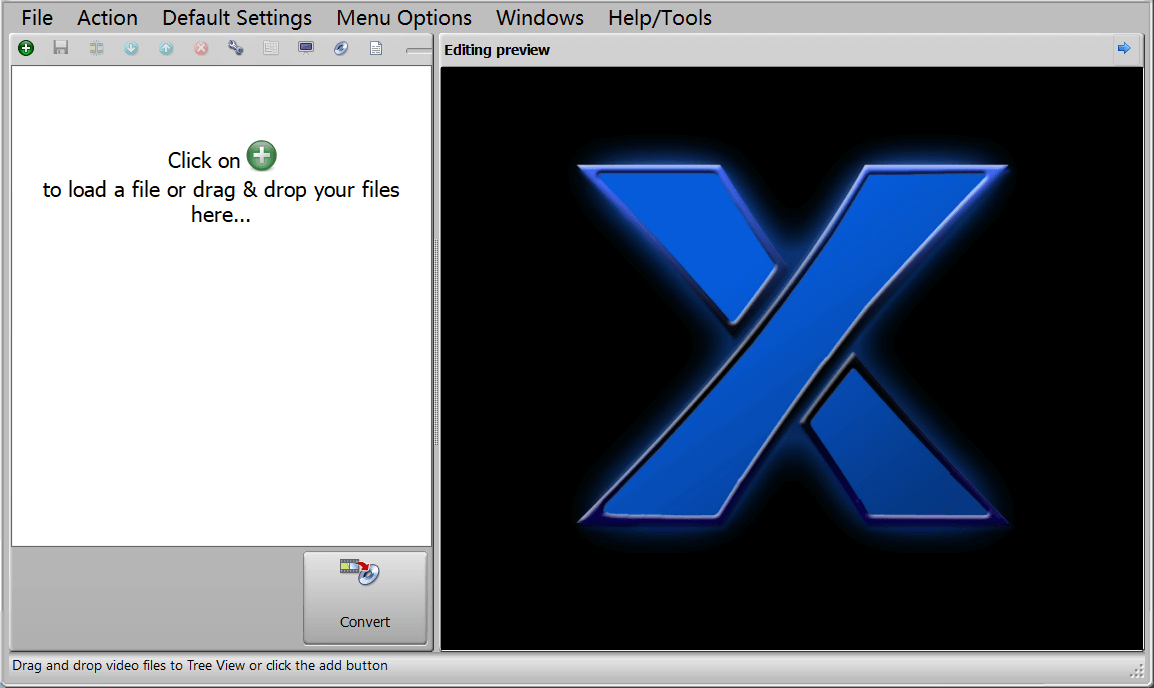
You are getting this “load file” window once you launch the program. Click on + to load an HD video or several HD videos.
Step 3. Edit the Project if Needed
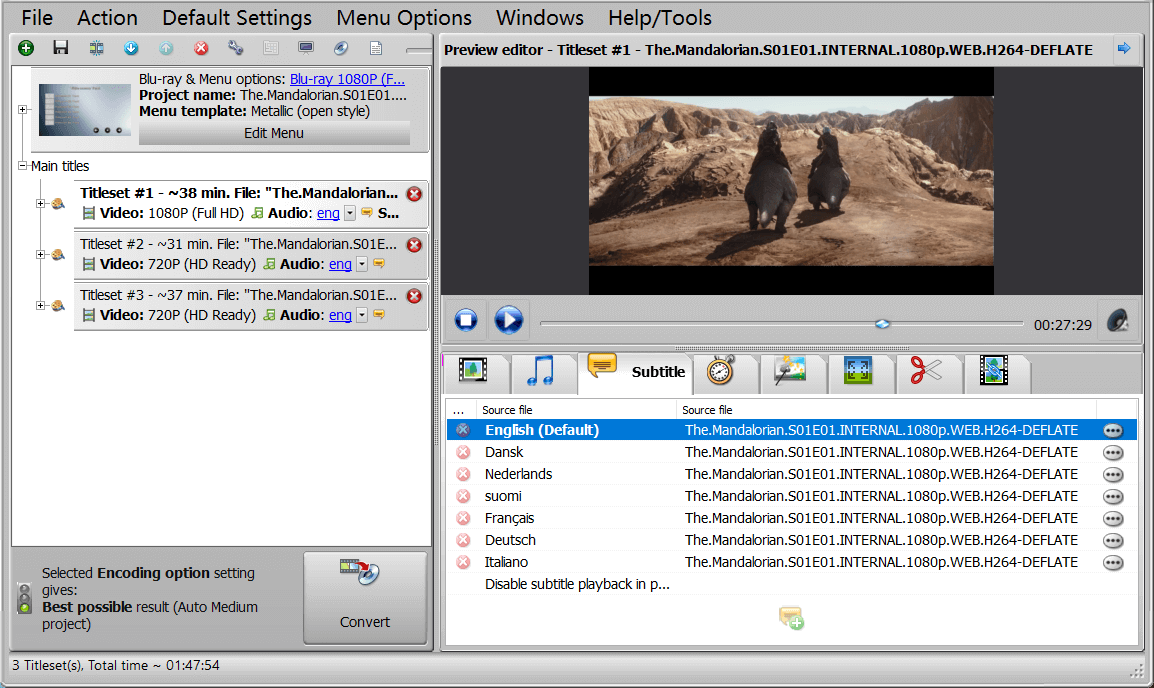
There are eight icons below the preview editor window. With these useful tools, you can edit every piece of video well. Want to remove unwanted subtitle/audio tracks, set another track as forced subtitle, manually create chapters, clip the video, and even merge several clips together into one? That’s no problem at all.
Step 4. Create AVCHD Disc Menu with the Built-in Menu Editor
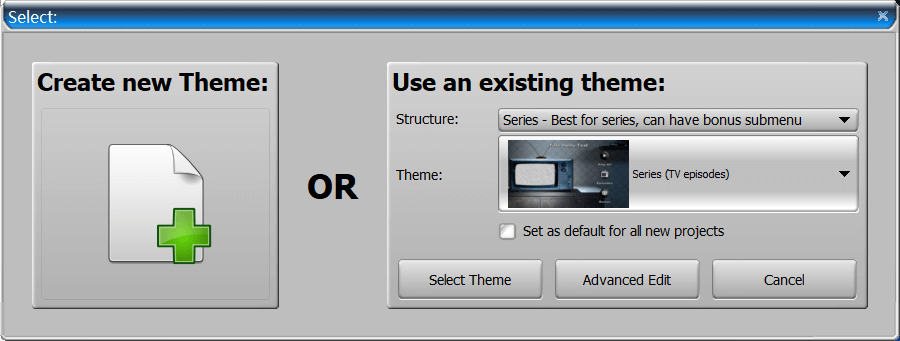
Click on the “Edit Menu” button and the window below will show up. If yours is a series of videos, it’s good to select Series as the structure. And if it is a single movie, you can select Movie to be the menu structure. The “Create new Theme” option is to completely customize the disc menu. You can click on that if you don’t like any theme or template it provides.
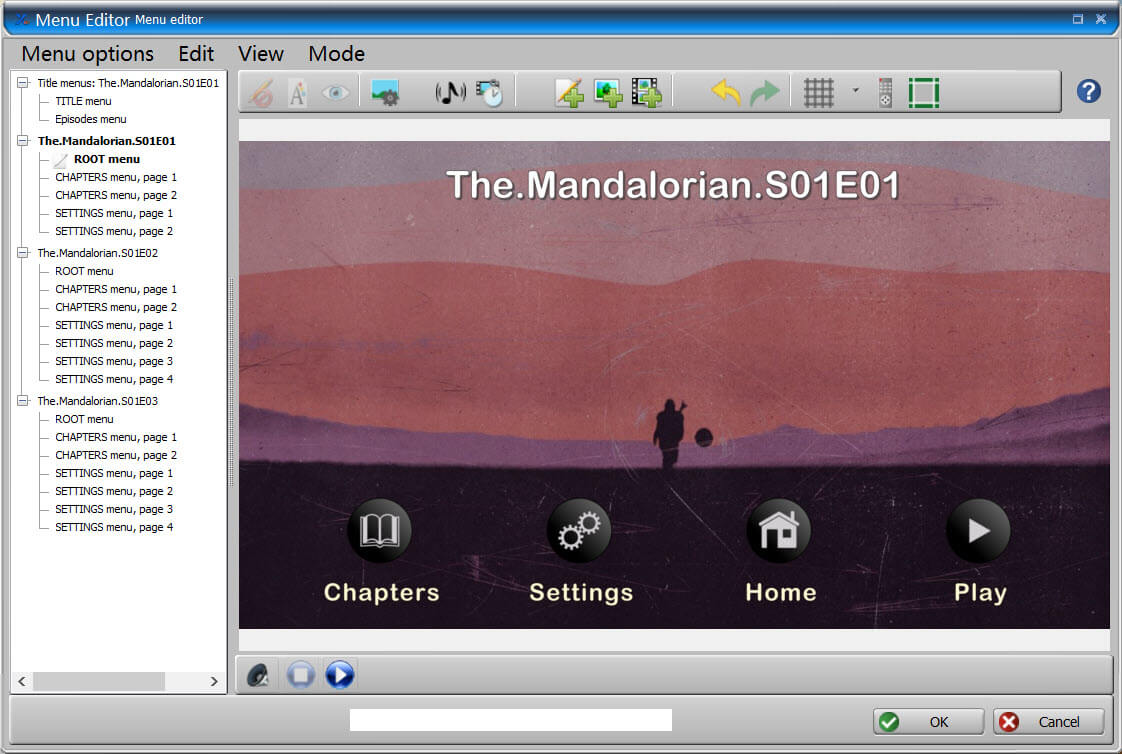
Here is an example of the disc menu. You can continuously edit and preview in real-time until you are satisfied.
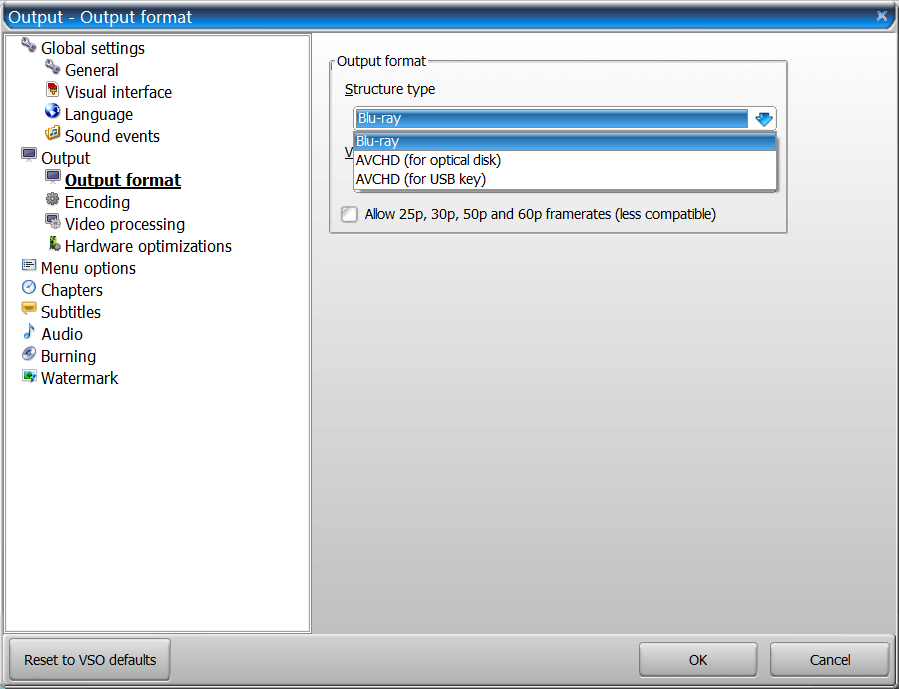
Step 5. Select AVCHD (for Optical Disk) for Burning
Hit “Blu-ray & Menu options” on the main interface or click “Default Settings” > “Output format” to open this setting window. We are going to burn 720P or 1080P videos to a regular DVD disc, so we should choose AVCHD (for optical disk) and click OK.
Step 6. Start Burning HD Video to AVCHD DVD Disc
Press the big Convert button on the main interface. You will need to wait a while until the parsing process is finished, then this window will show up. If the DVD disc has been inserted and read, the Burn button will be able to click.
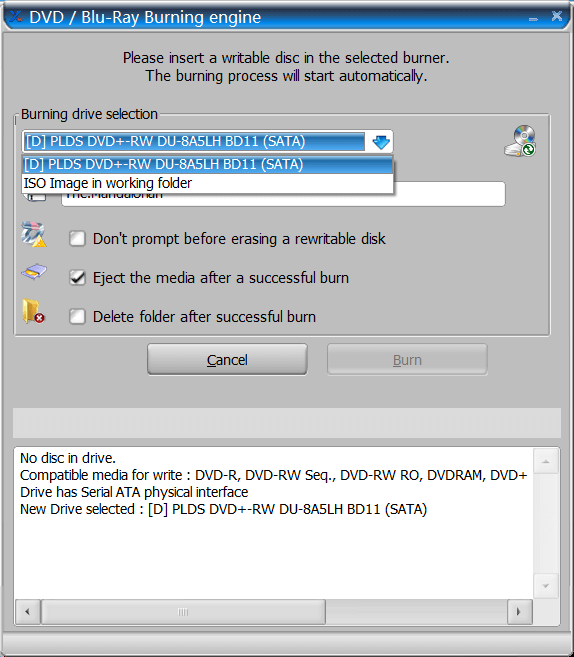
The burning process will start running immediately after clicking on Burn. It won’t take long for your AVCHD DVD disc to be ready for playback on any home Blu-ray player.
ConvertXtoHD now offers a 7-day full trial. You can download the free trial here. And if you feel this post is useful, don’t hesitate to share it with others.

